
Description
Overview
ADD Picture + Parts
|
Part |
Description |
|---|---|
|
1 |
|
|
2 |
|
|
3 |
|
|
|
|
Description
The wireless two-channel transmitter is suitable for flush mounting and may only be used to control wireless receivers. By using this two-channel transmitter, you can expand the switching function of existing switches or push buttons via a receiver. The two-channel transmitter checks whether a switch/push button is live and transmits the corresponding code (A, B, C, or D) to the wireless receiver, which in turn switches the consumer. This wireless two-channel transmitter cannot be used in Niko Home Control installations.
If a voltage is detected at the inputs S1 or S2, the transmitter transmits the corresponding Easywave code (A/B) to an Easywave receiver, which then switches another device.
Shutter controls can only be used to control 2-button motor operation modes!
Intended use
The flush-mounted transmitter may only be used to operate Easywave radio receivers.
The manufacturer shall not be liable for any damage caused by improper or non-intended use.
Technical details
|
Specification |
Value |
|---|---|
|
Frequency |
868.30 MHz |
|
Radiated power |
0.12 mW |
|
Modulation |
FSK |
|
Coding |
Easywave |
|
Power supply |
230 V AC 50 Hz |
|
Power consumption |
max. 0.25 W - 0.08 W stand by |
|
Range |
free-field: approx. 150 m building: sapprox. 30 m |
|
Operating temperature |
-20 °C to +60 °C |
|
Dimensions |
43/42 |
|
Conformity |
2014/53/EU |
Safety information
Before using the device, carefully read through the operating instructions.
The electrical installation may only be performed by an authorised and qualified electrician.
-
A suitable, easily accessible disconnecting device (e.g., automatic circuit breaker) is required for the electric power supply circuit of the flush-mounted transmitter.
-
Never control moving devices or heaters without observation.
-
Note also the operating instructions of the radio receiver.
-
Have faulty radio controls checked by the manufacturer!
-
Do not make any unauthorized alterations or modifications to the transmitter!
Installation
230 V – OFF
Make sure there is no interference with the wireless connection. Do not mount the device in a distribution box, in metal casings, in direct proximity to large metal objects, on the floor or close to it.
Step 1
Connect the supply voltage and the devices to be controlled, according to the wiring diagram.
Only wires with a cable cross-section of 0.5 mm² to 2.5 mm² shall be connected. The stripping length of the connecting wires is 6 to 7 mm.
If you want to connect a switch, put the attached jumper between the L and F terminals. When delivered, the transmitter is in button mode (jumper not set).
230 V – ON
Step 2
Place the transmitter in the flush-mounting box.
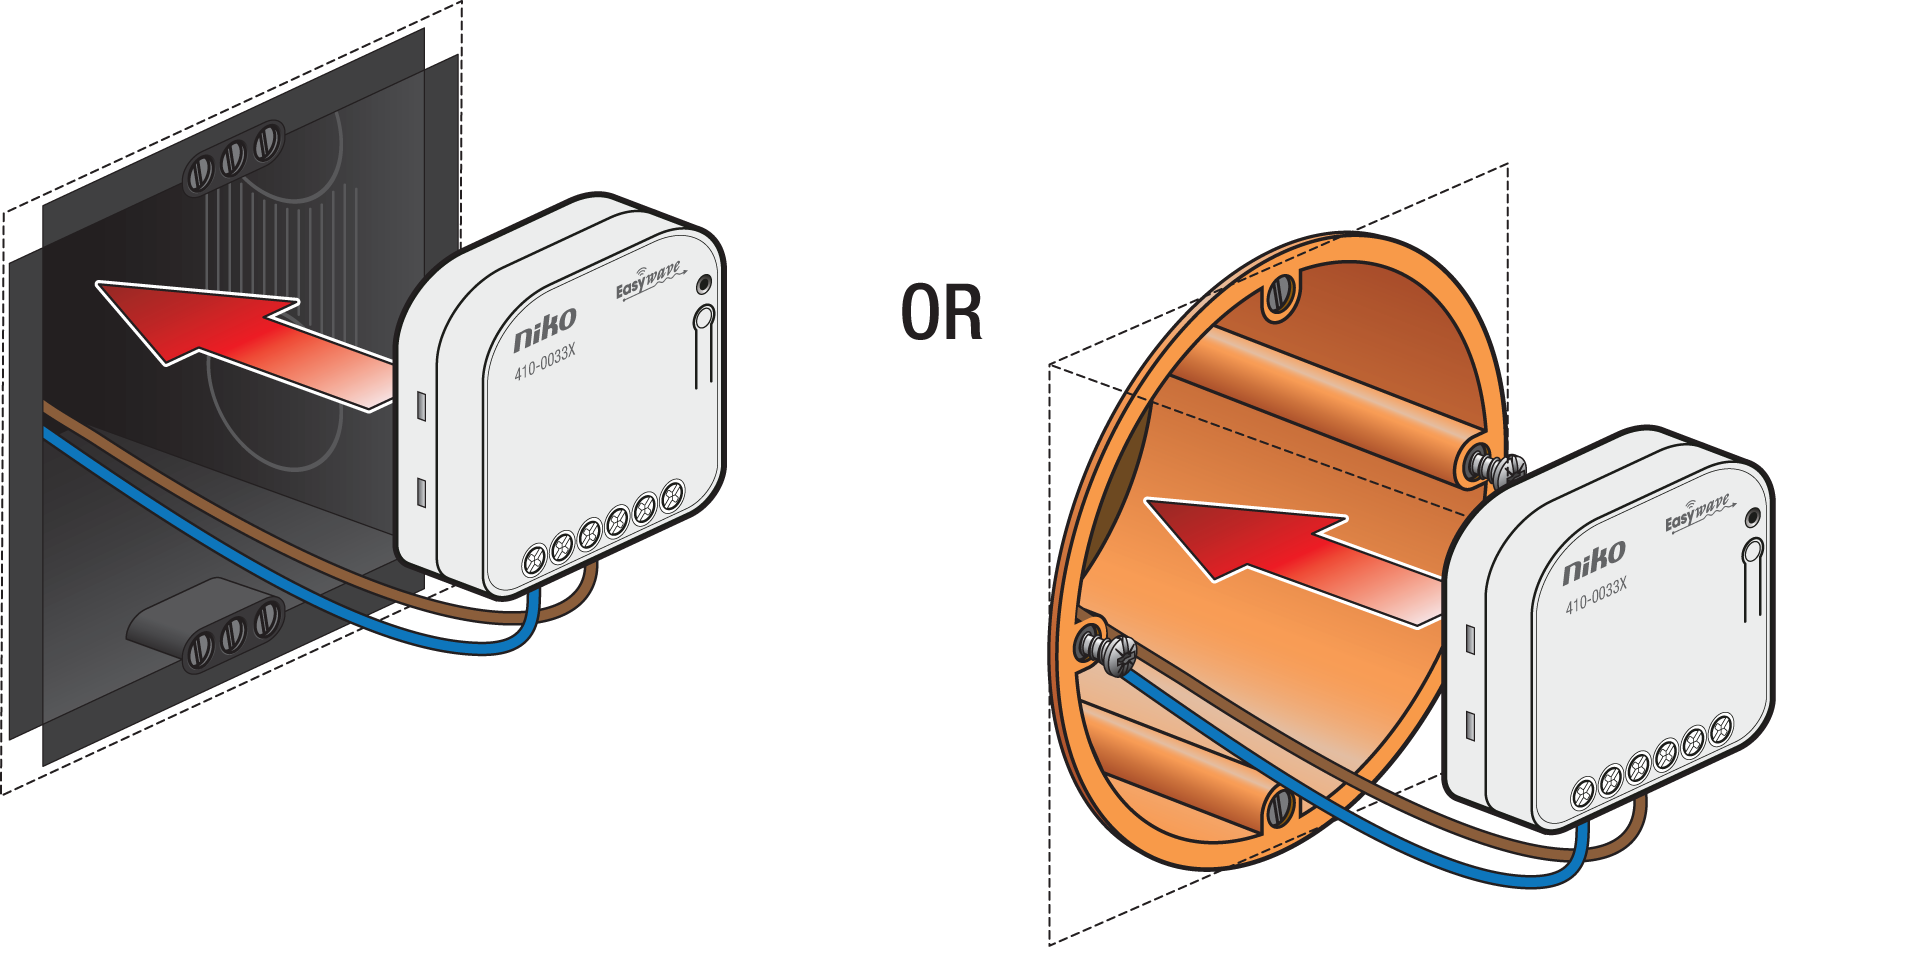
Program the transmission code into the receiver. Please read the operating instructions supplied with the receivers.
Step 3
Mount the blind plate, push-button, or switch.
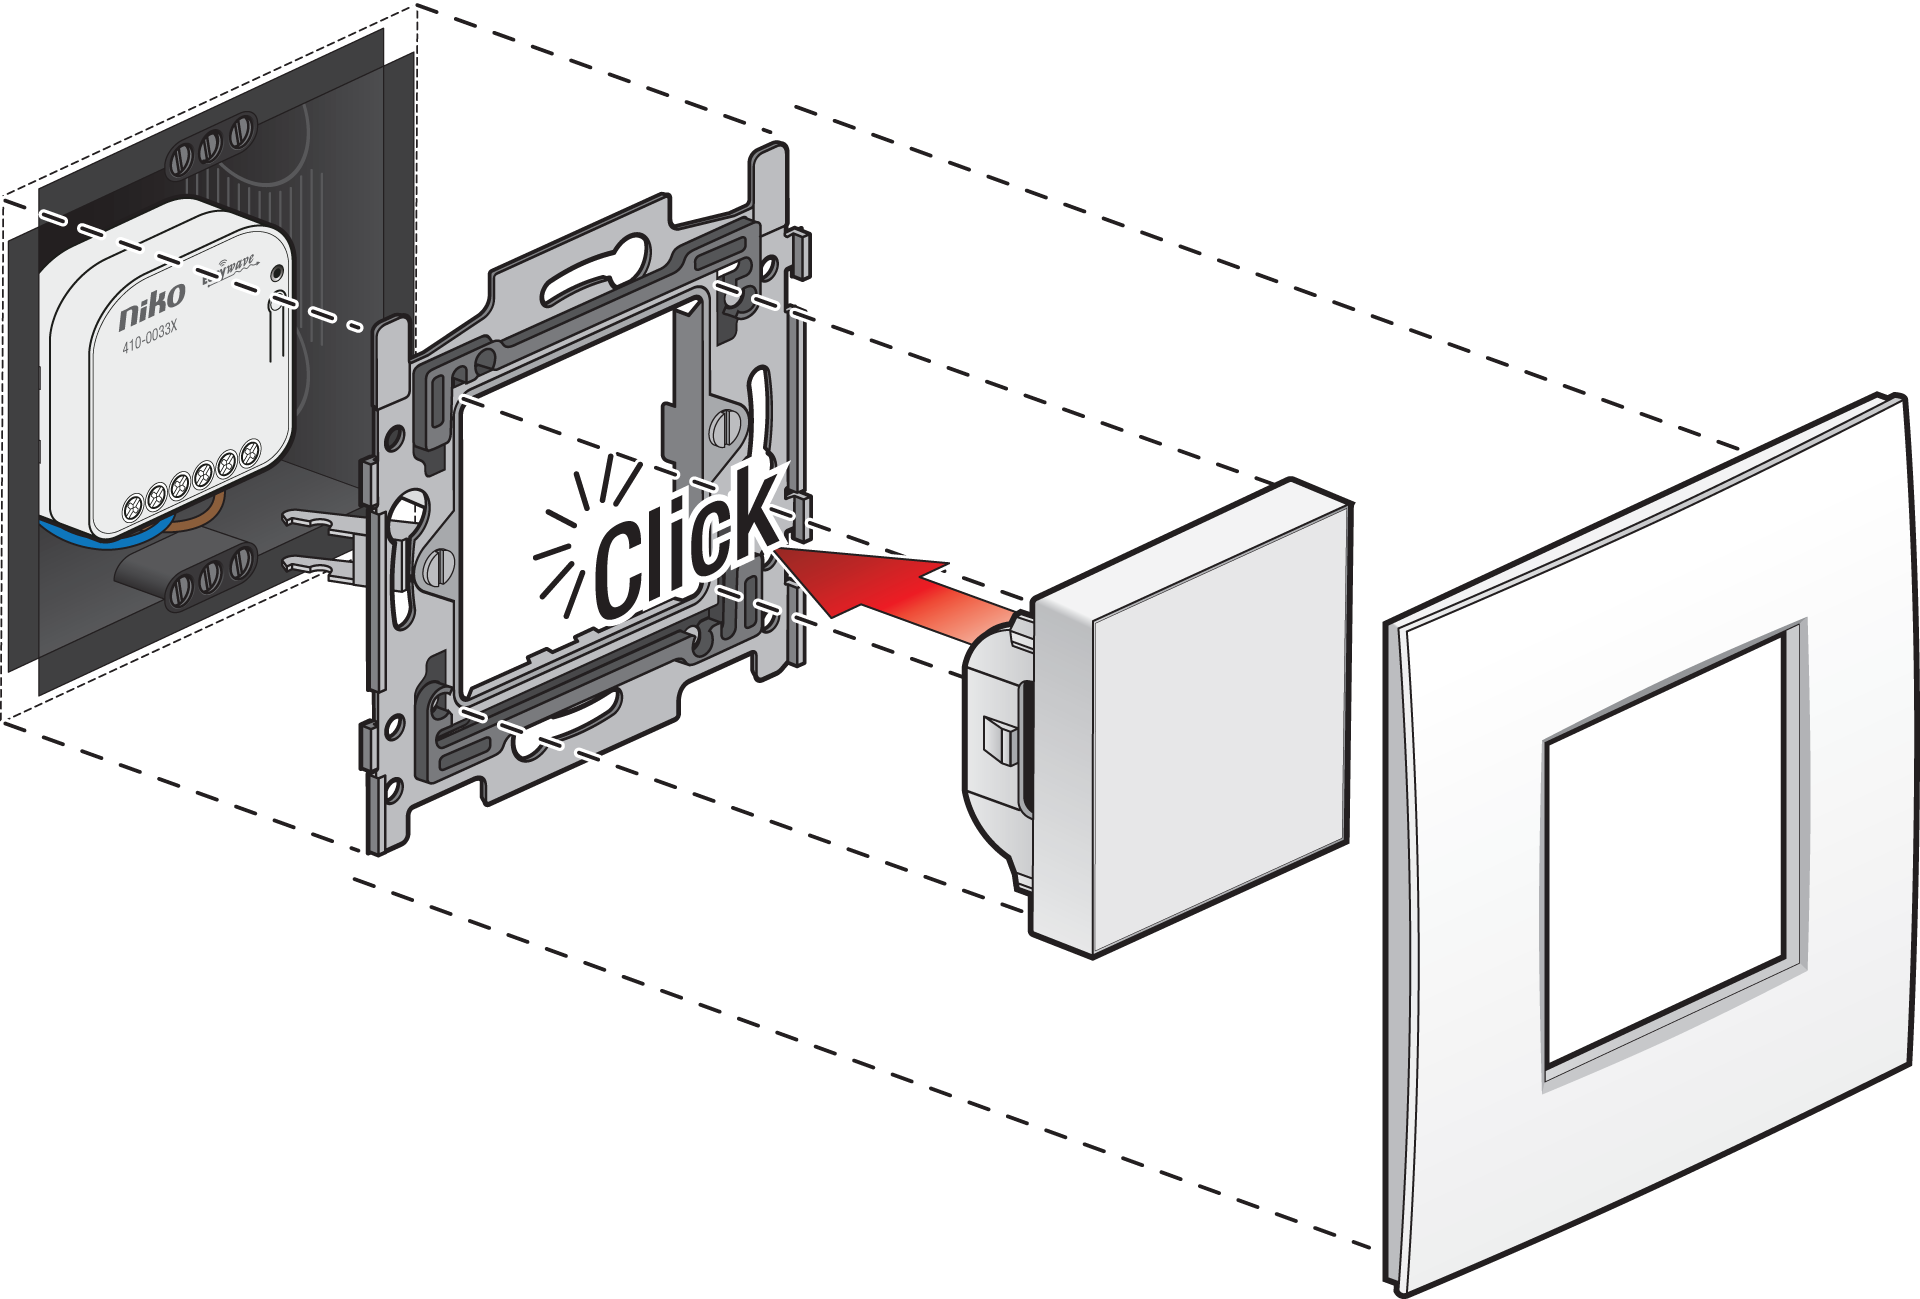
|
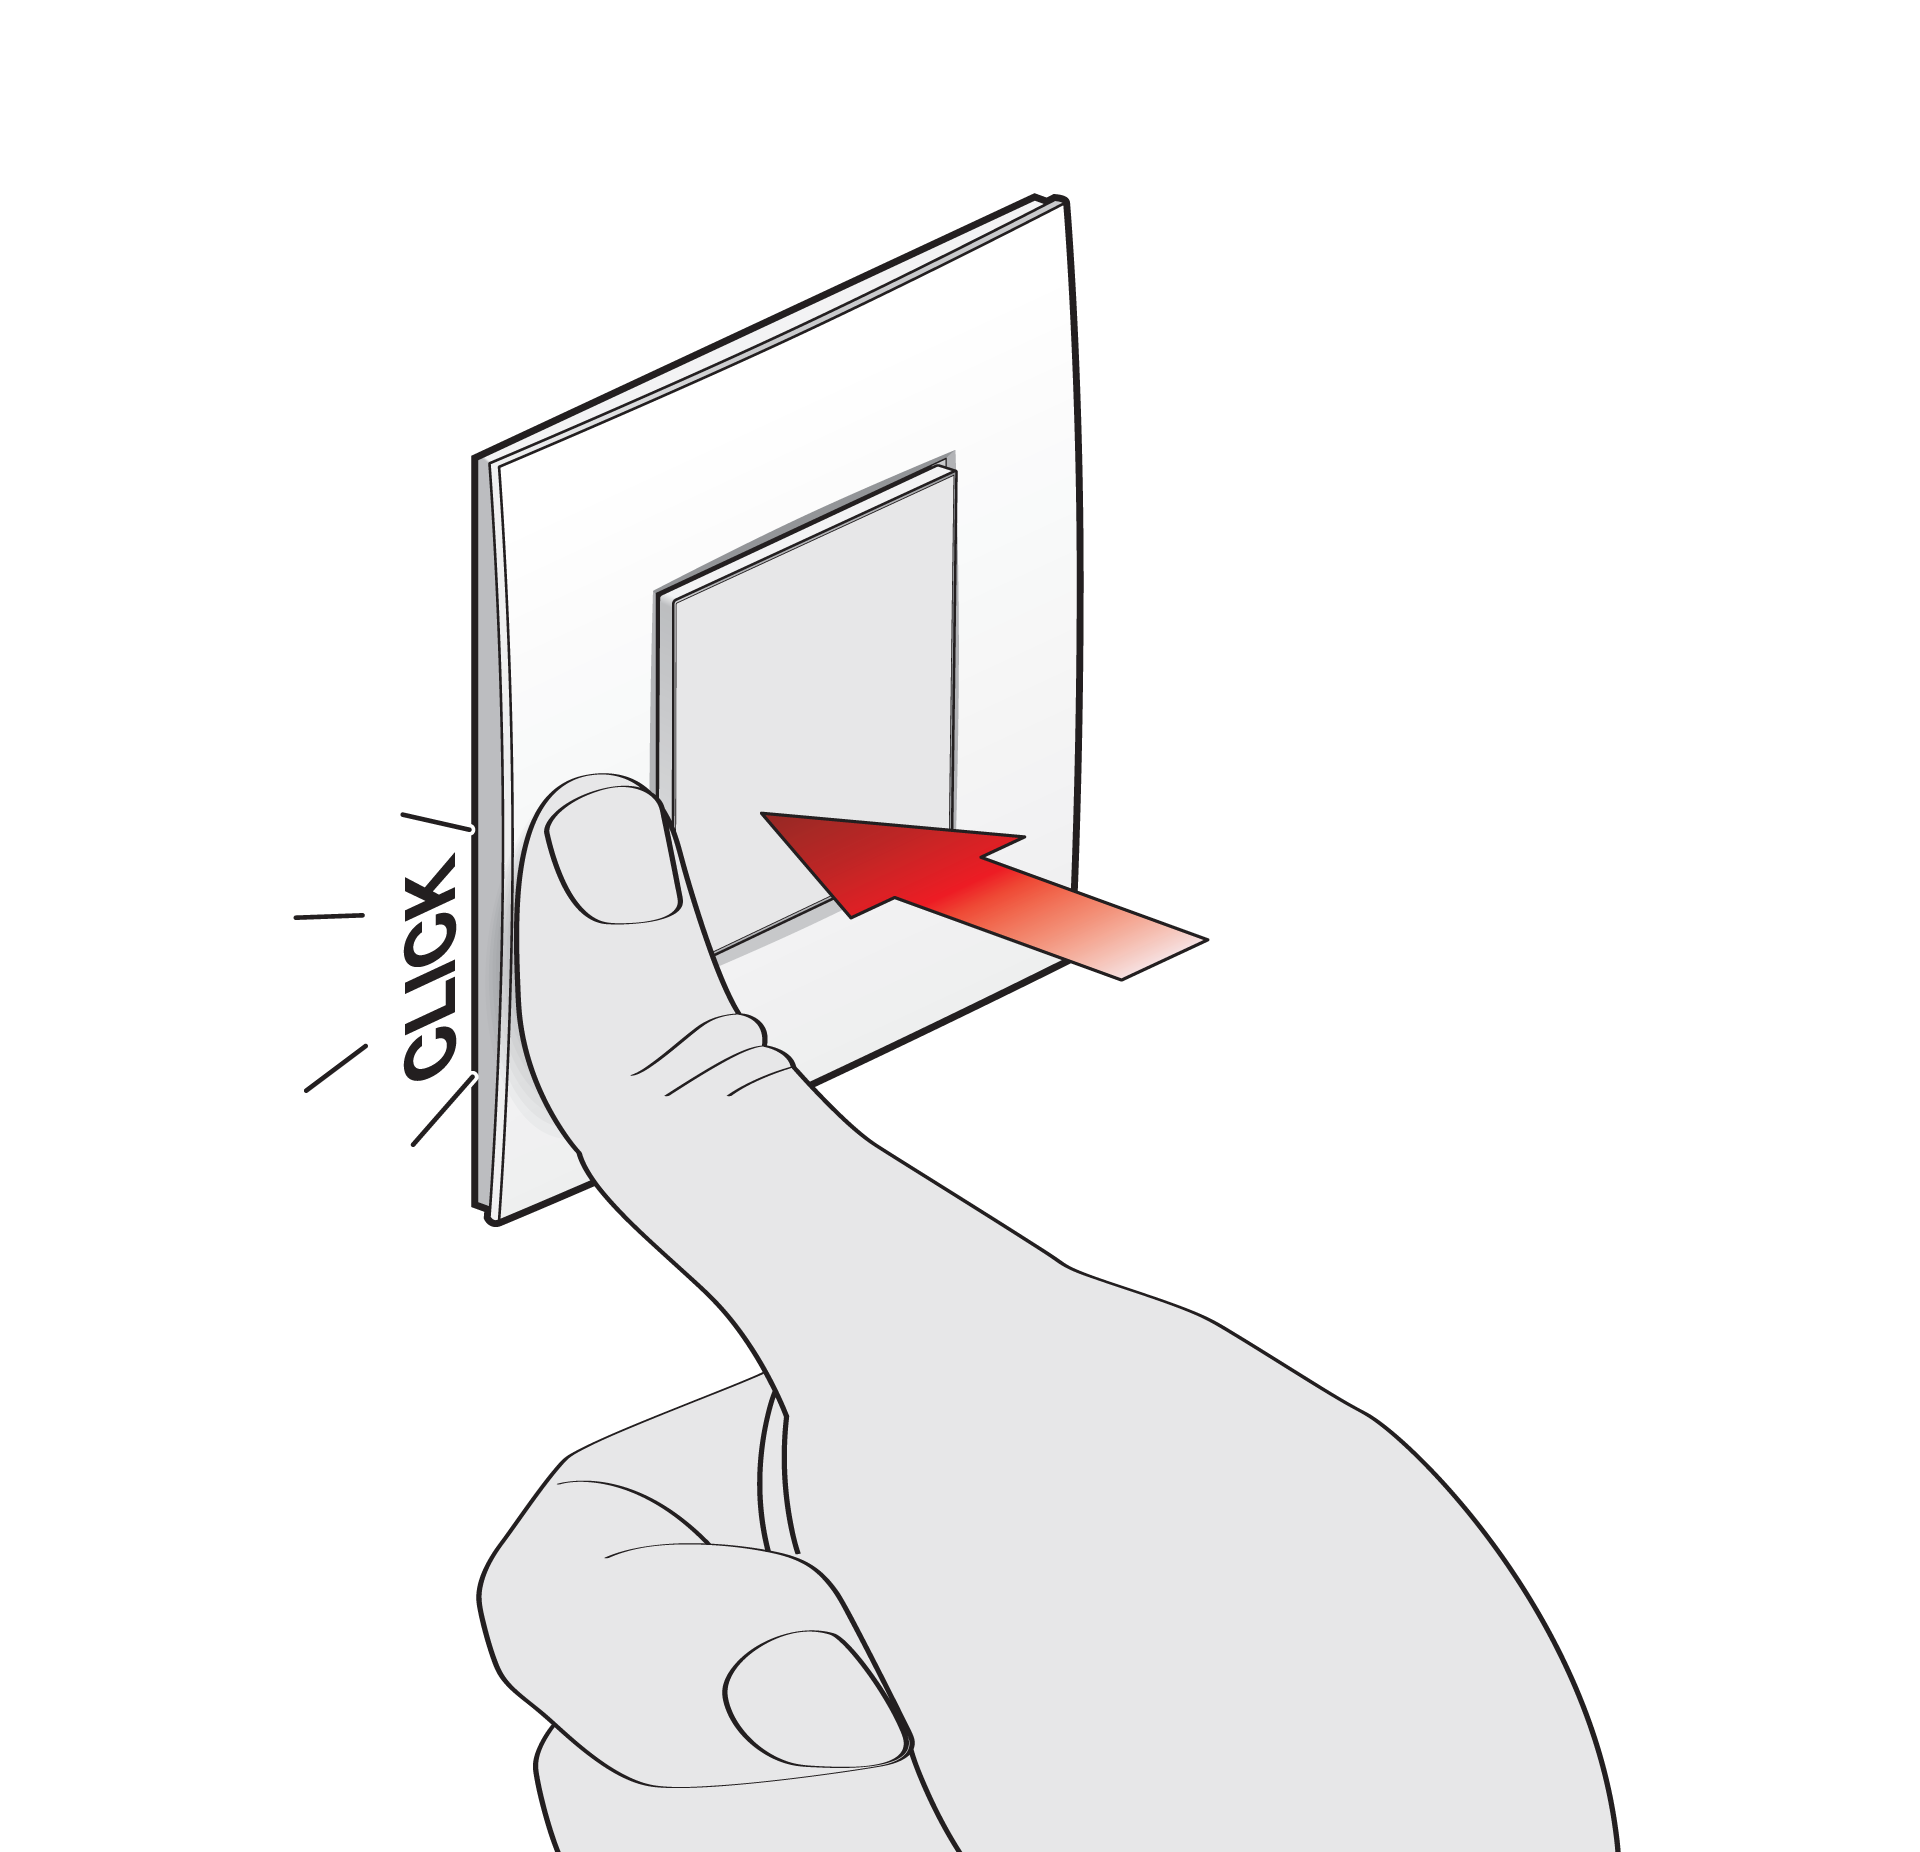
|
Wiring diagrams
Switch wiring
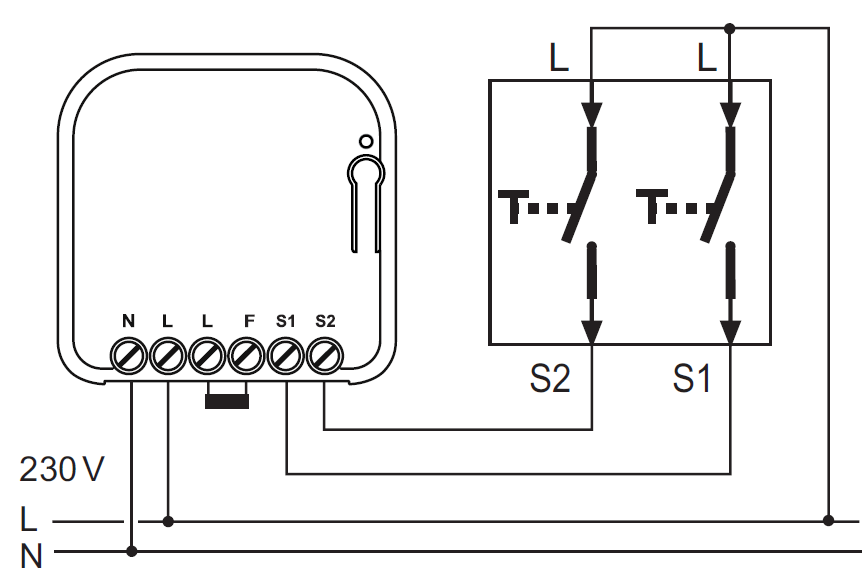
The transmission begins whenever the switch changes state and lasts approximately 0.5 seconds.
Switch 1: input S1
-
close switch: --> code A1
-
open switch: --> code B1
Switch 2: input S2
-
close switch: --> code A2
-
open switch: --> code B2
Push-button wiring
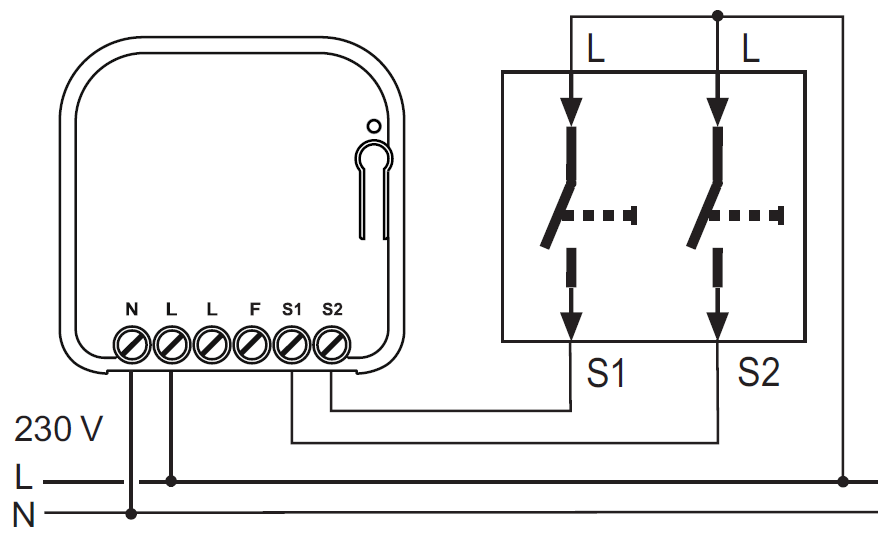
Transmission lasts as long as the button is pressed, up to a max. of 36 seconds.
Push-button 1: input S1
-
code A1
Push-button 2: input S2
-
code B1
Shutter-control wiring
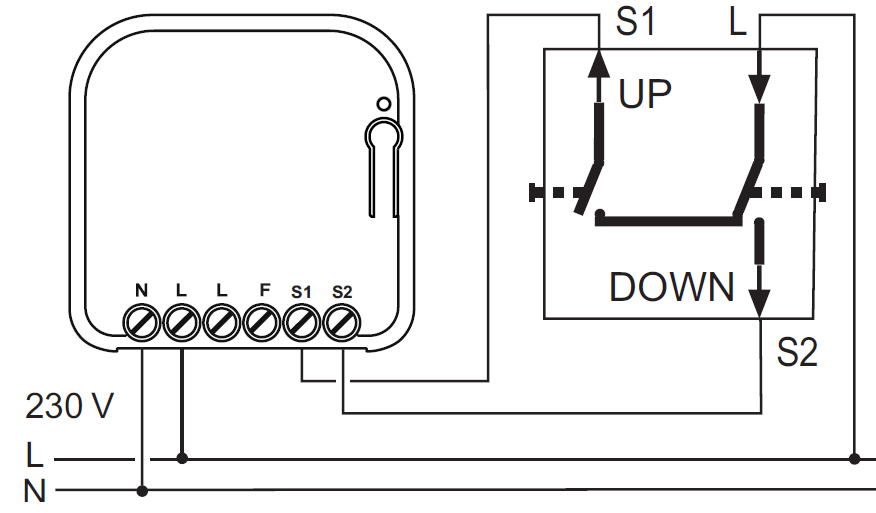
Transmission lasts as long as the button is pressed, up to a max. of 36 seconds.
Push-button 1: input S1
-
code A1
Push-button 2: input S2
-
code B1
Programming the transmitter
Procedure
The transmitter is programmed into the Easywave receiver by sending the desired transmission code (A1/A2/B1/B2). To do this, press a connected push-button or switch during the according step of the learning procedure.
For more information about the learning process, read the operating instructions of the respective receiver.
Remote learning
The transmitter supports the POTA (Programming Over The Air) remote programming function. This can be used to reprogram an already-installed and no longer accessible receiver, as long as the receiver is programmed into it.
Press the PTx (POTA) button for 5 seconds to start remote learning. The PTxLED flashes slowly.
When in this mode, POTA commands are transmitted as the connected buttons are pressed.
Use the jumper to select the code for the remote learning function, according to the following scheme:
|
Without jumper |
With jumper |
|---|---|
|
S1 --> code A1 |
S1 --> code A1 |
|
S2 --> code B1 |
S2 --> code A2 |
Connected switching elements must be open. It is necessary to use a push-button.