Starting point
-
The wireless smart hub is powered on.
-
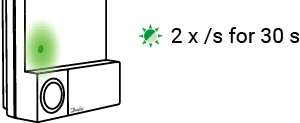
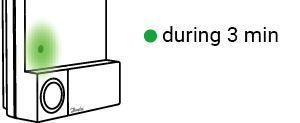
In case of the Danfoss Icon1: The LED on the Danfoss Icon Zigbee® module is off. If not, see LED behaviour.
-
In case of the Danfoss Icon2: The Danfoss Icon2 system is installed and configured completely.
-
You have created the Danfoss thermostats as generic heating devices in the Niko Home Control programming software.
-
You are in the Address overview window.

Procedure
If you experience any problems during the addressing process, see Troubleshooting.
Pairing the Danfoss Icon system with the wireless smart hub
-
During the pairing process, the addressing screen in the Niko Home Control programming software remains the same.
-
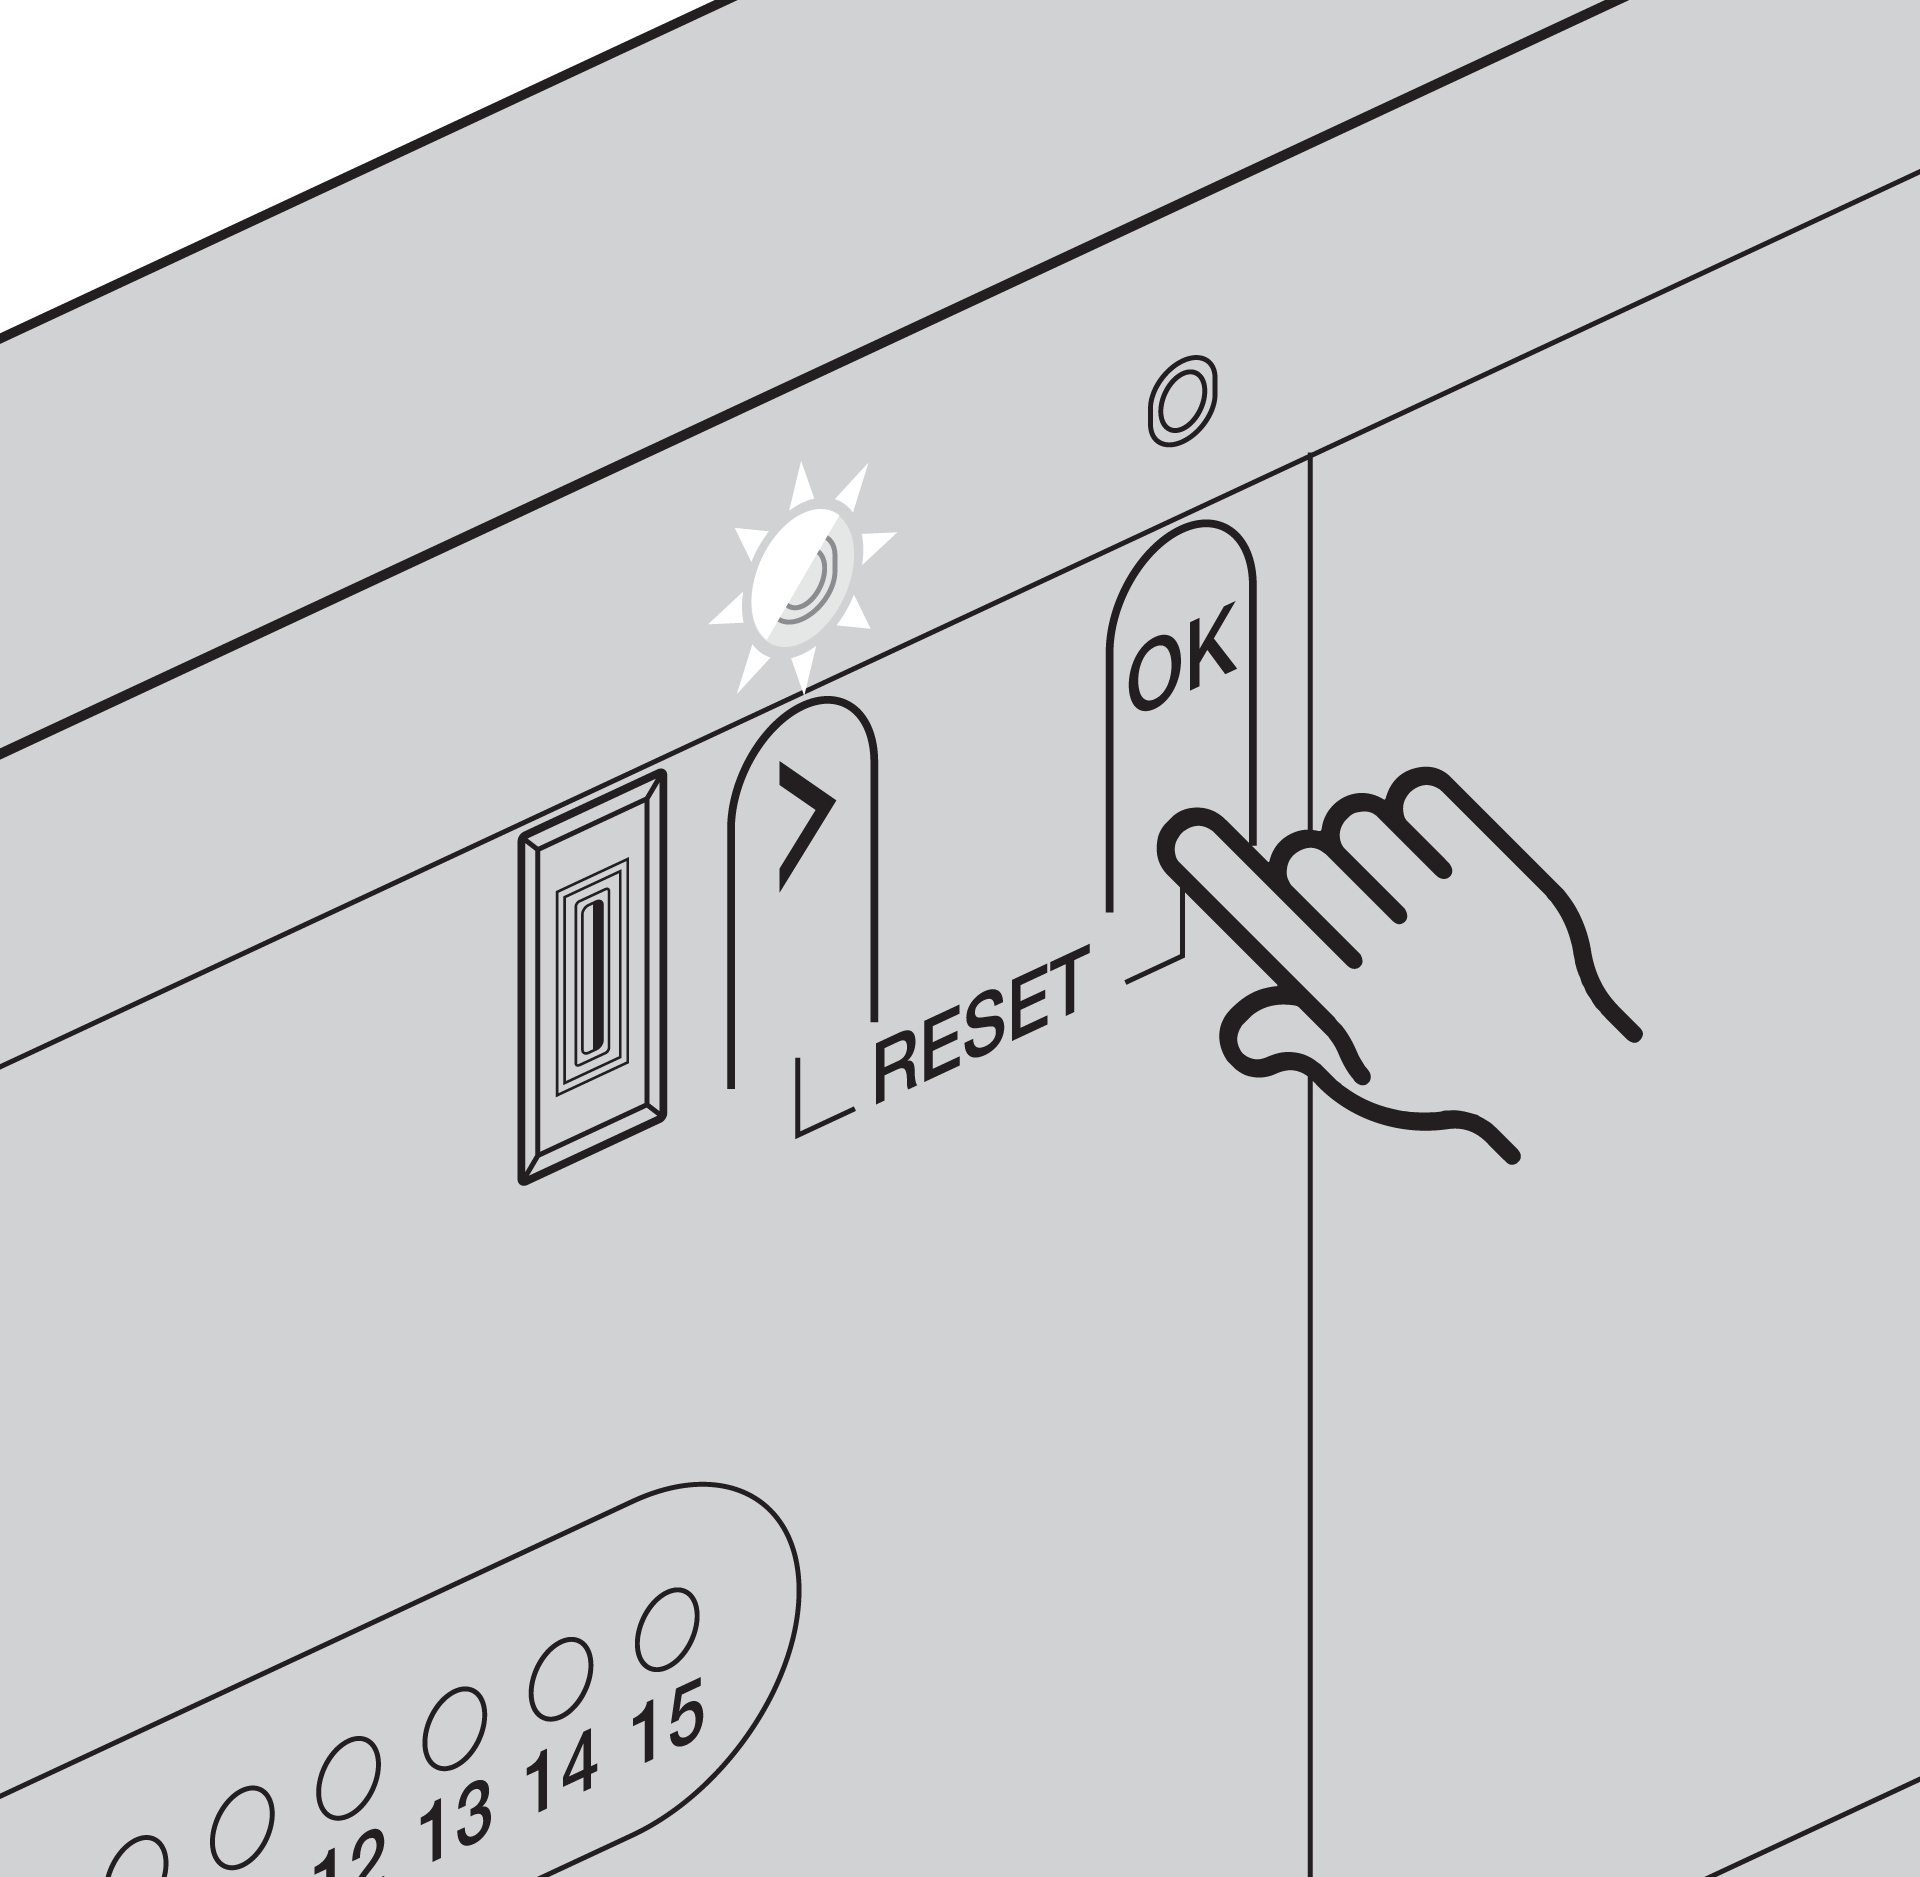
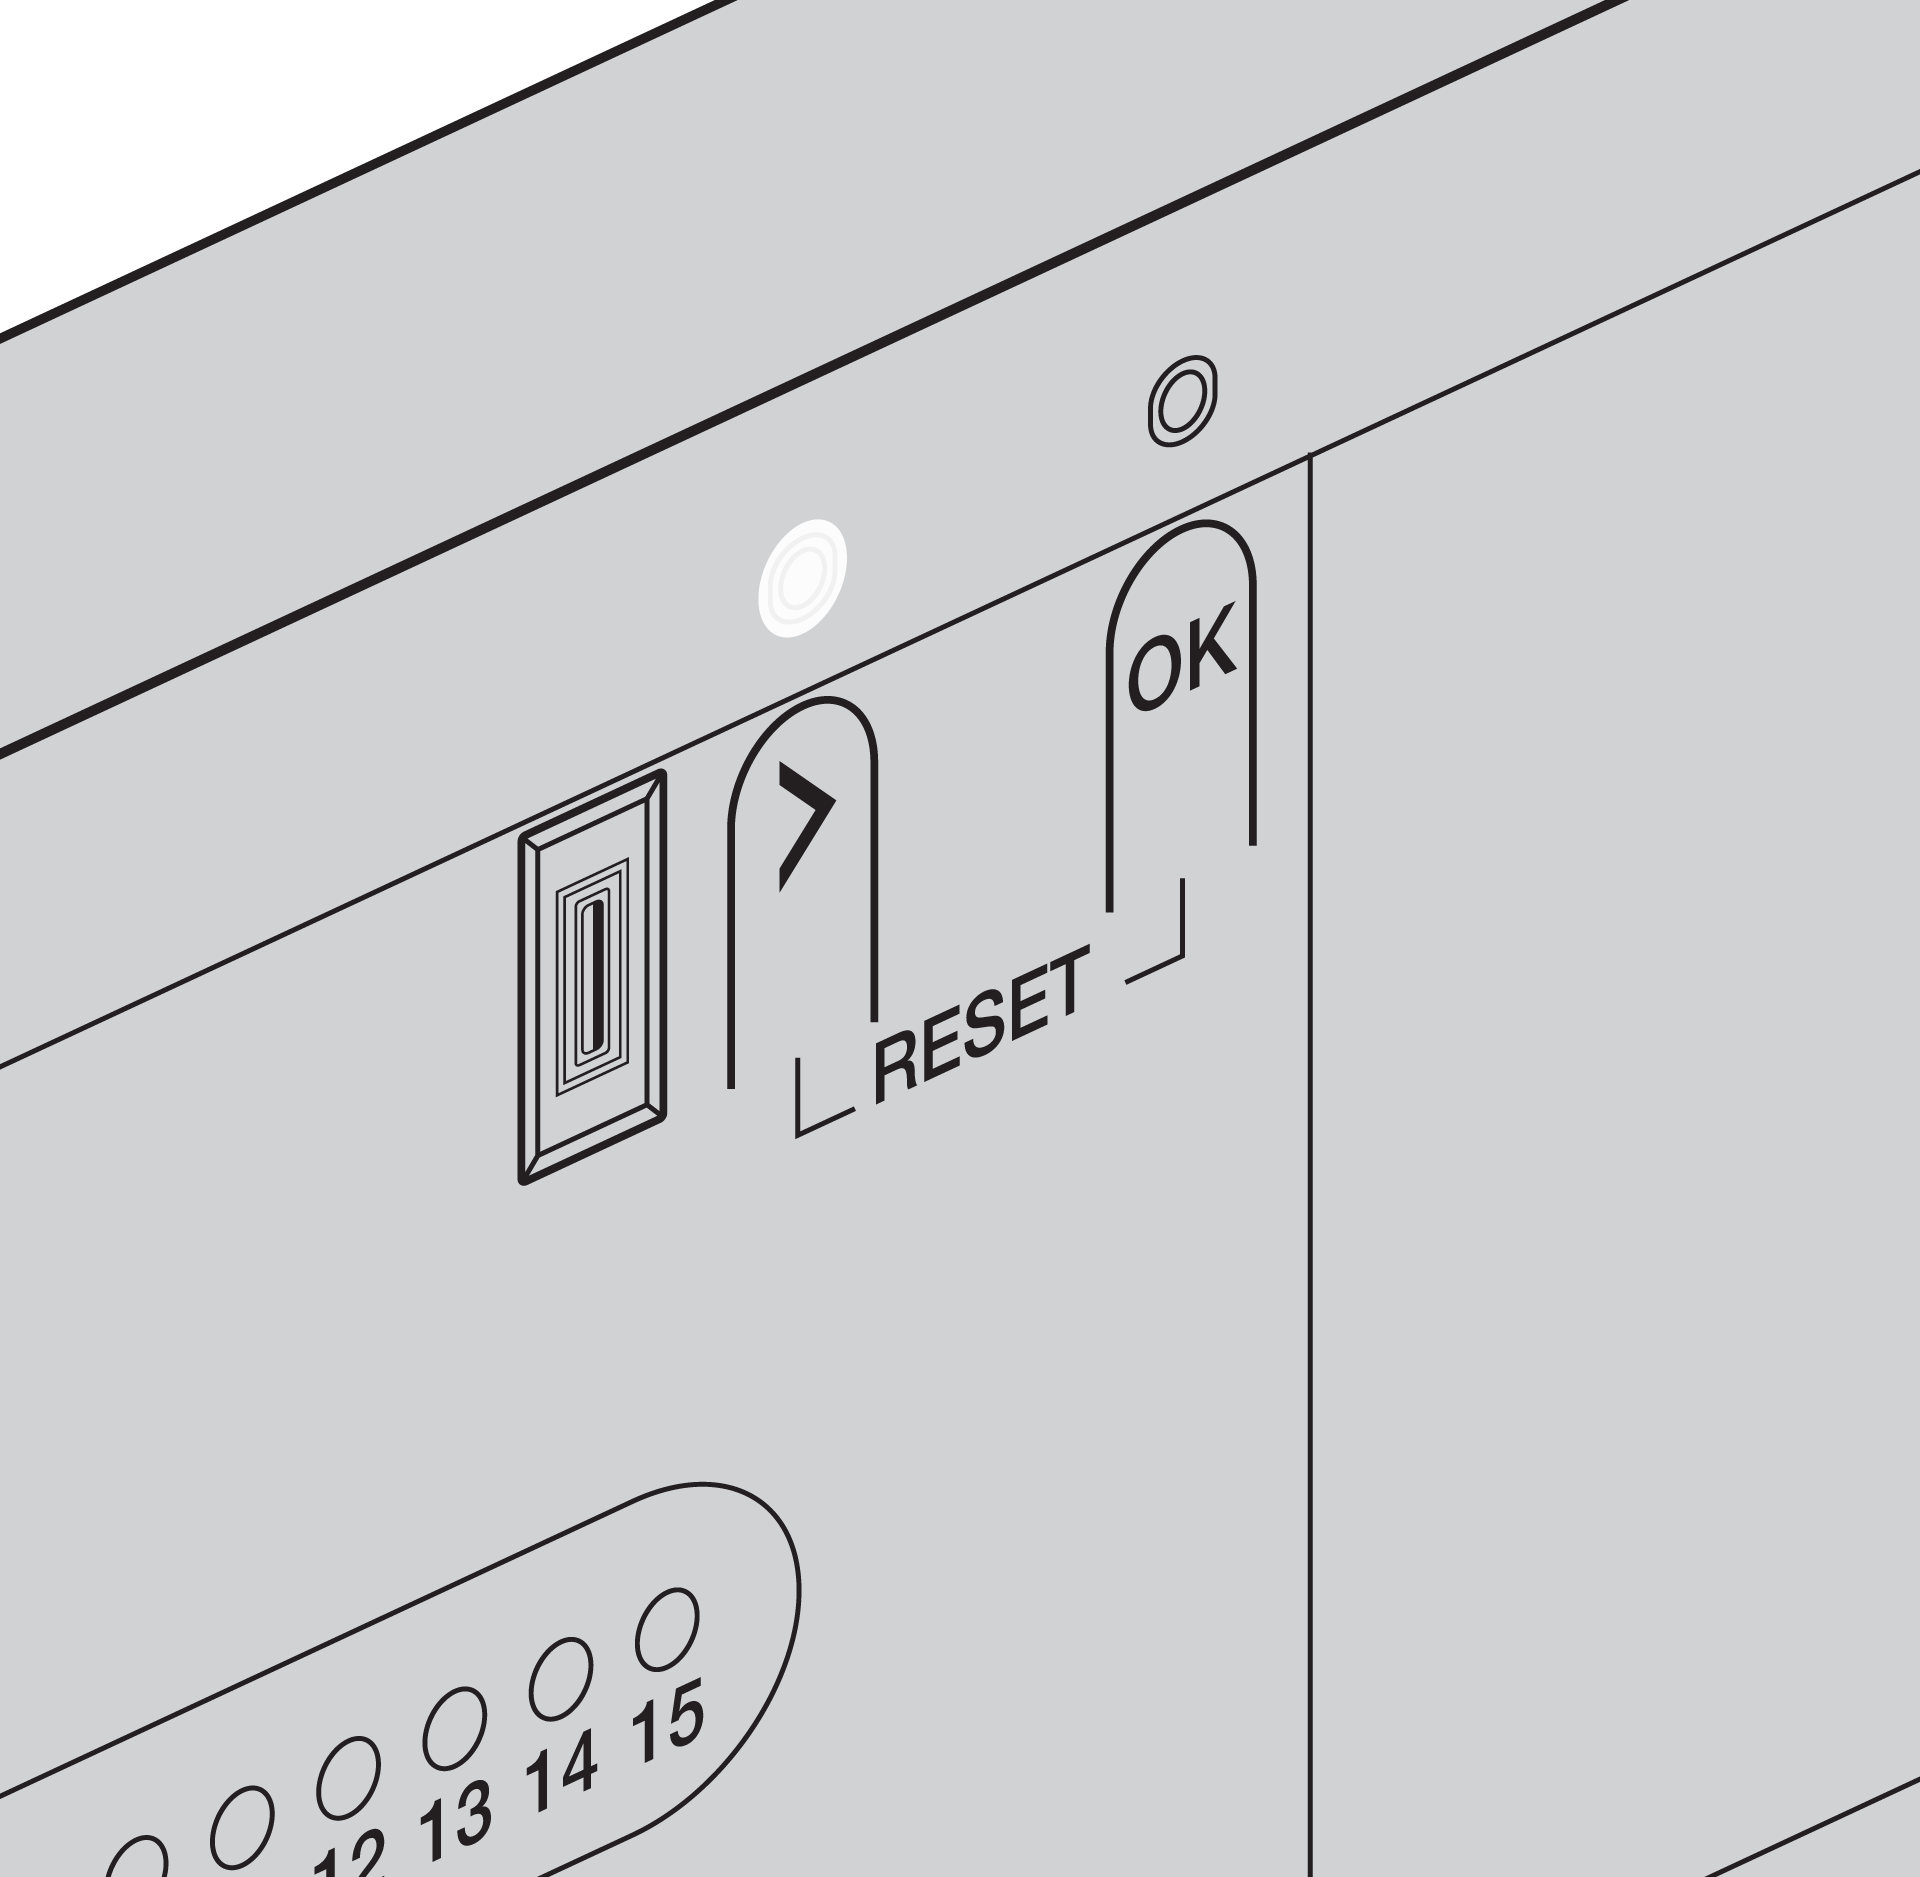
If the operation of the LED deviates from what is described below, see LED behaviour during Zigbee pairing.
|
Danfoss Icon1 Zigbee module |
Danfoss Icon2 (integrated Zigbee interface) |
|---|---|
|
|

|
|
|
|
|

|
|
The Address overview window in the Niko Home Control programming software remains the same.
|
|
Addressing the Danfoss thermostats
-
If you interrupt the addressing process of the Danfoss thermostats, you can continue the process at any time by reopening the Address overview window - controls and devices in the Niko Home Control programming software. The Danfoss Icon system and the wireless smart hub remain paired.
-
You address the Danfoss thermostats one by one. Addressing multiple thermostats at the same time is not supported.
For each Danfoss thermostat in your installaton:
1. Click on the plus sign of the Danfoss device you want to address.
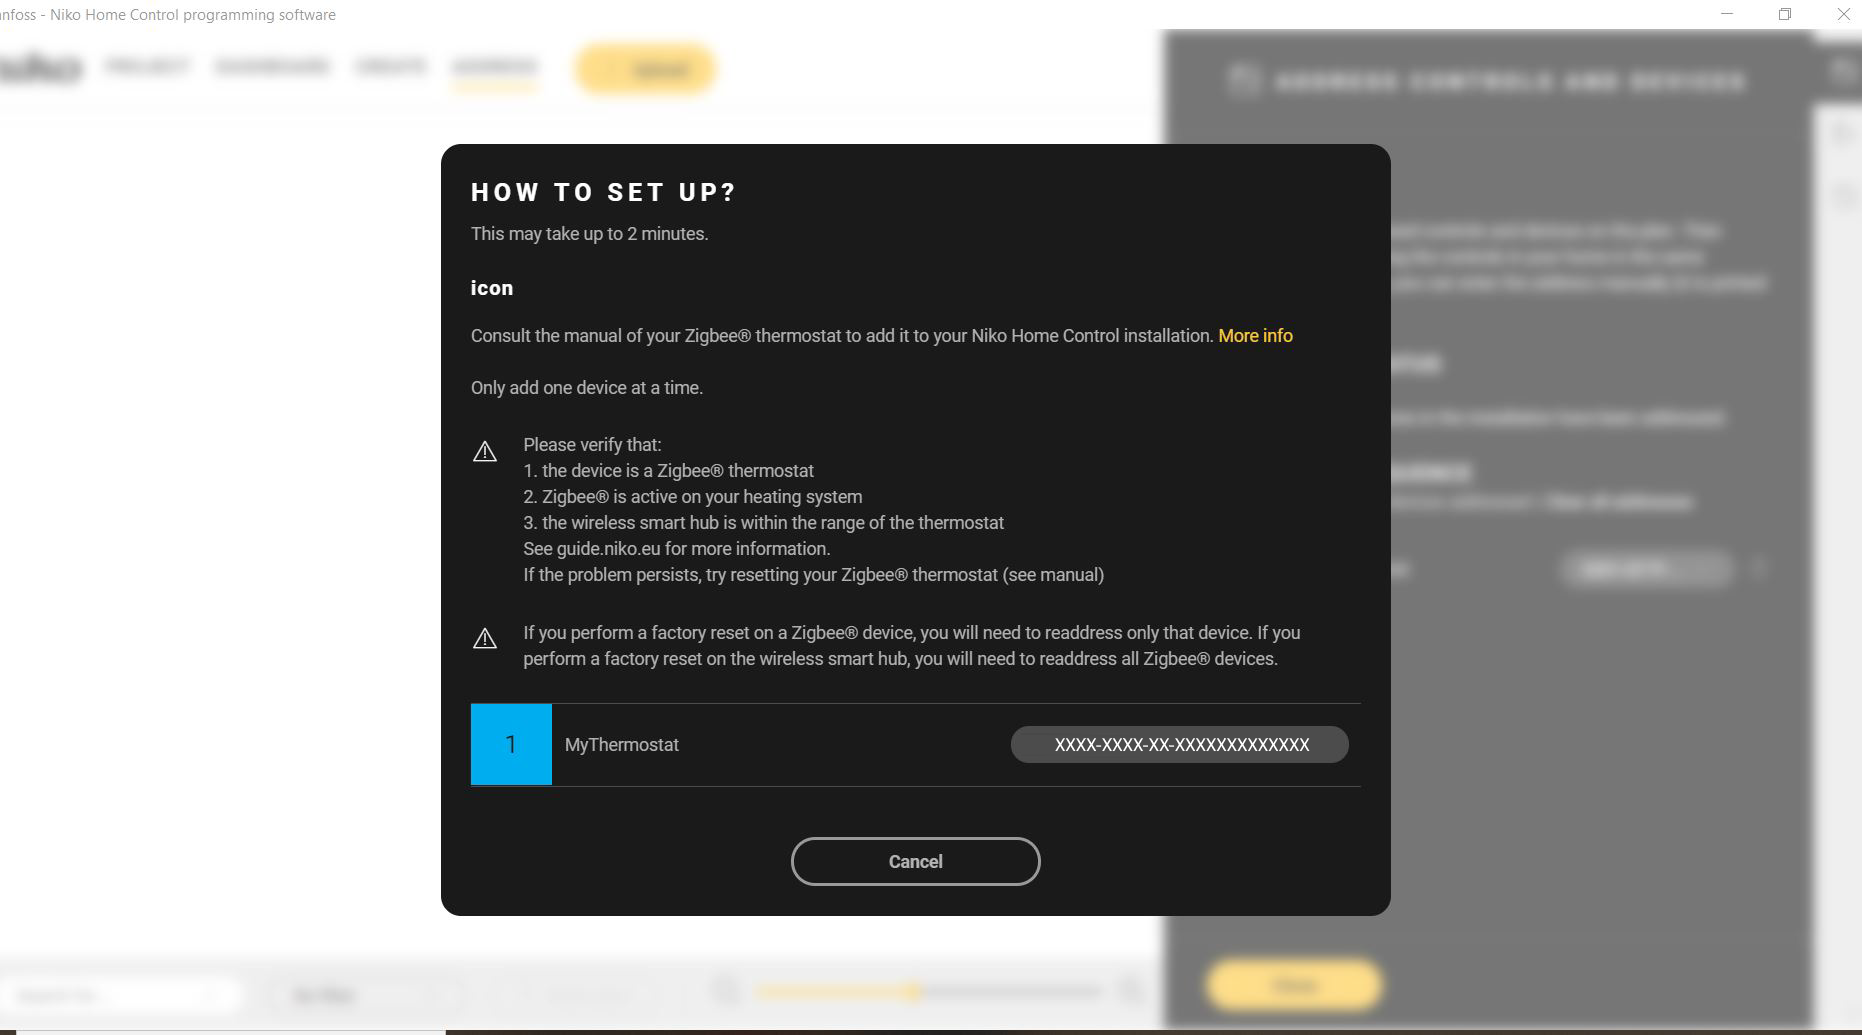
2. Change the setpoint temperature on the Danfoss thermostat. The device is addressed in the software.
